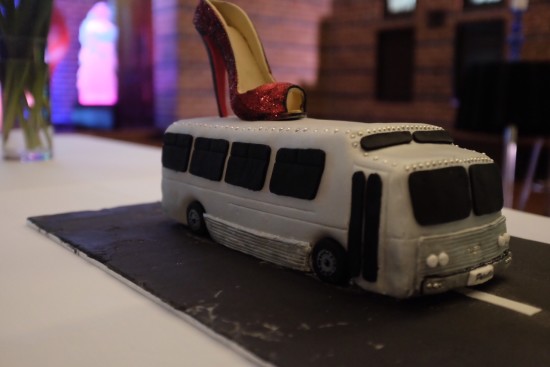
When Arabella chose, ‘Priscilla, Queen of the Desert‘ as the theme for her 21st birthday party I knew I’d need to make an appropriate cake and thought about what best symbolised the movie/musical.
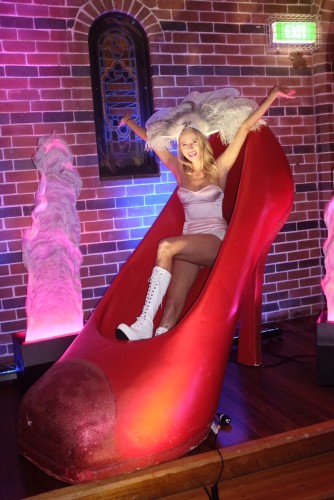
The realisation came upon me that central to the movie is the bus named ‘Priscilla’ with its giant sparkling stiletto perched precariously on the roof. I do love a challenge but this was a little more ‘challenge’ than I was hoping for.
Never mind, off I went into the deep unknown of how to make a cake that looked like a bus with an edible shoe.
The first step was to make the cake then store it in the freezer until the time came to sculpt it into a bus. I used a Donna Hay recipe called Muddy Chocolate Cake. I like this recipe because it makes a heavy cake and heavy cakes are a lot easier to sculpt.
- 600g (20 oz) dark cooking chocolate, chopped
- 750g (1½ lb) butter, chopped
- 15 eggs
- 3 cups caster (superfine) sugar
- 3 tspn vanilla extract
- 3 cups self-raising flour
- 2½ tspn baking powder
- 1 cup cocoa powder
- 1½ cups almond meal
- Line a 40cm x 30cm cake tin with baking paper.
- Preheat oven to 140C (280F).
- Stir the chocolate and butter in a saucepan over low heat until melted and smooth. Set aside.
- Beat the eggs, sugar and vanilla in the bowl of an electric mixer until cream and thick. Fold in the chocolate mixture. Sift the flour, baking powder and cocoa over the top and gently fold through with the almond meal.
- Pour the mixture into the prepared cake tin and bake for 2 hrs 10 mins or until the cake is cooked when tested with a skewer.
- Allow the cake to cool in the tin.
- Remove from tin then wrap in cling film and store in the freezer until ready to use.
The next thing was to tackle the shoe and I did spend a lot of time getting anxious about how to make an edible stiletto. Drew, who’d had enough of carry-on said, ‘Just go out and buy a shoe’. And I said, ‘No one will sell you a shoe; you have to buy a pair’. And as I only needed one shoe, it was on with my quest to make one solitary shoe.
Can you believe you can actually buy a kit to make an edible stiletto! It was news to me and saved me a lot of grief. I ordered the stiletto kit from Bake Boss and it arrived the next day. Now…if you’re going to make a stiletto shoe it takes a few days so don’t try to do this the night before you need it. Also, while the kit contains all the templates you need, there are a lot of things it doesn’t contain so you need to make sure you have everything required before embarking on the shoe; things like edible glue, fondants, colourings, edible glitter, wire, paint brush, tylose (CMC) powder, etc.
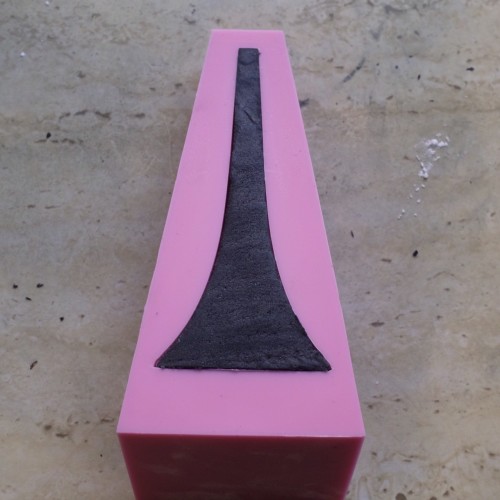
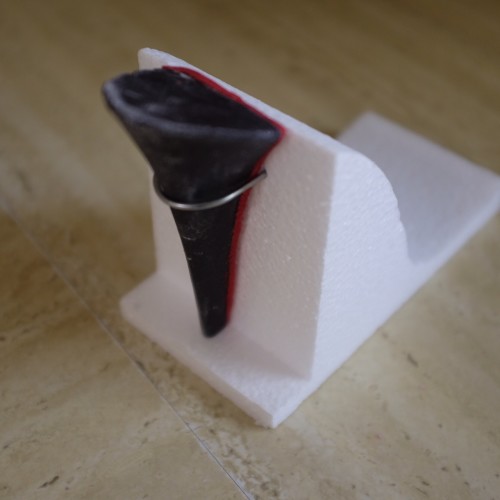
To start making the shoe you first need to make the heel. You use black fondant mixed with tylose powder. The amount of tylose powder you need to harden the fondant is not a precise amount. It depends on factors like humidity. I was fortunate to make the shoe during a time of cold and dry weather where humidity wasn’t an issue. I wouldn’t want to make anything with hardened fondant during high humidity – there’s enough drama with optimum conditions.
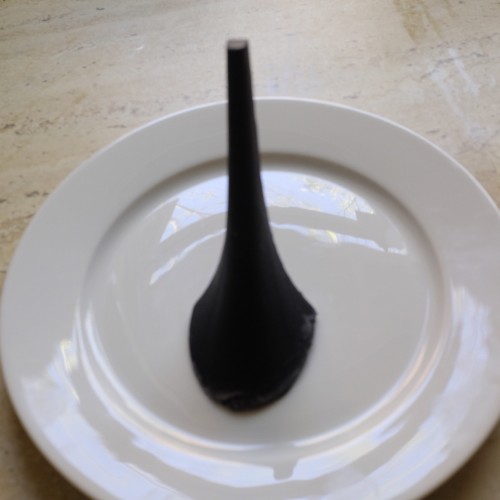
After kneading the tylose into the black fondant, you place it in the provided mould after it’s been dusted with cornflour. It doesn’t take much effort to make the heel so why not make a few – spares just might come in handy. I was glad I had a spare.
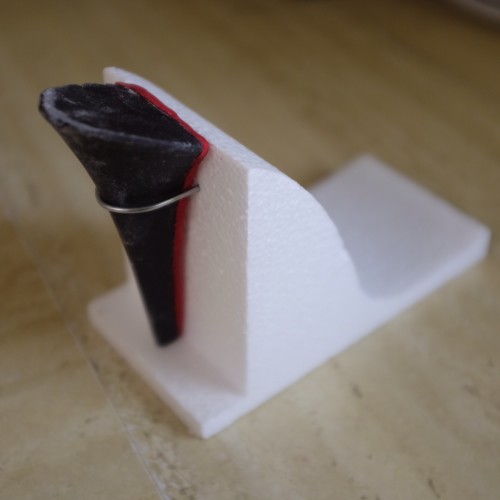
The heel needs to harden overnight. The next day roll out some red fondant and using glue, affix it to the under-side of the heel. Use a paring knife to cut the fondant flush with heel.
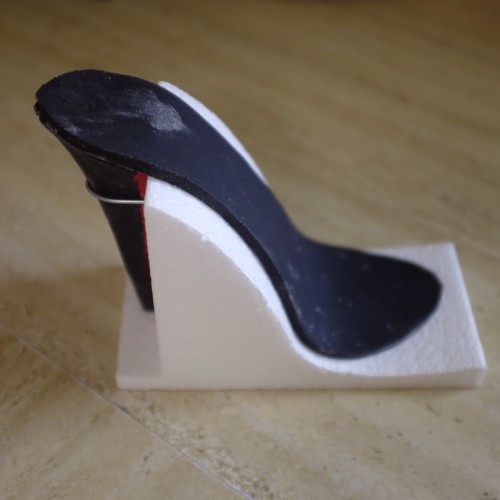
The heel needs to be secured to the provided foam board with a piece of wire. I used wire from a coat hanger. Then you make the sole of the shoe out of black fondant with tylose powder. The instructions say to run the fondant through a pasta machine but this in no way worked for me so I went the traditional route and used a rolling pin.
You need edible glue to affix the sole to the heel.
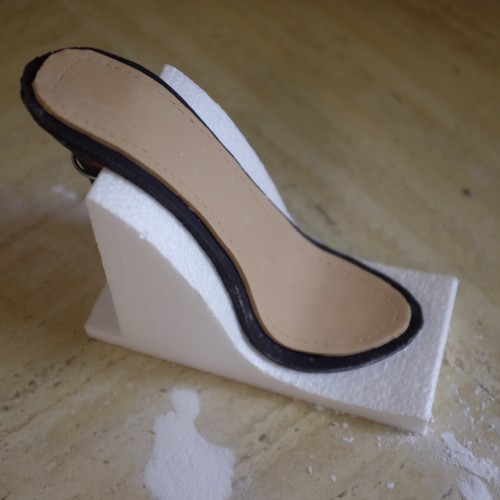
Next you make the inner sole of the shoe. You need to tint white fondant, tan. When the colour is well incorporated you roll it out and use the template to cut out the right shape. You need glue to affix the inner sole to the sole of the shoe. When the inner sole is in place, you use a paring knife to make markings along the edge of the sole that look like stitches.
There are a couple of templates to choose from for the decorative part of the shoe. Once you’ve made your choice you need to roll out black fondant with tylose powder in it, then roll out more tan-coloured fondant. Place the tan fondant on top of the back fondant then use the templates to cut out the shape. For the next part you will need an extra pair of hands. Fortunately Archie was home and he helped me lift the top part of the shoe onto the sole. This was a bit stressful but I was surprised and relieved at how the shoe stayed in place and maintained its shape.
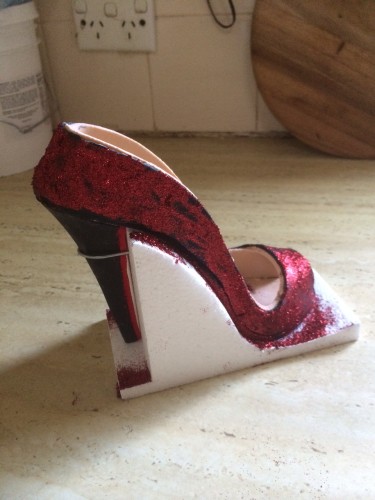
Leave the shoe to dry overnight and then decorate. I knew I wanted the shoe to have a bit of a sparkle so I lightly brushed the shoe with glue then dabbed red glitter on it using the wrong end of a teaspoon. Some of the glitter did get onto the tan part of the shoe but I didn’t worry; I blew it off just before affixing the shoe to the bus.
I let the stiletto dry overnight while I made the bus. As we needed to transport the cake and the shoe to the venue, I left the shoe wired to the foam board and only attached it to the bus once we were at our destination.
To make the bus…
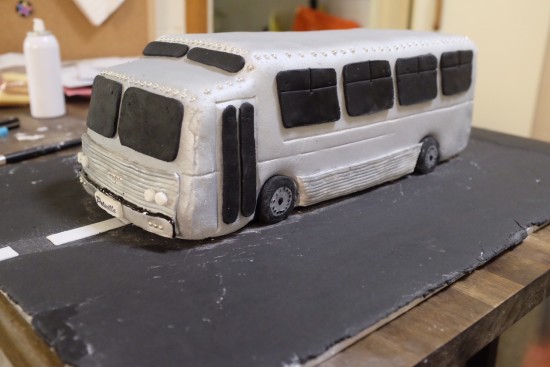
Unfortunately, no template could be found. Drew and I used google to find images of the bus used in the movie. It’s an older-style silver bus with tinted windows.
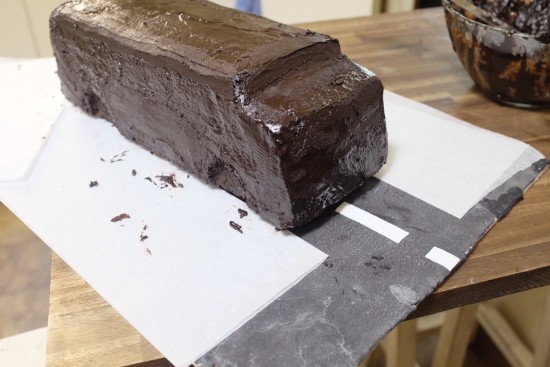
The process started the night before with me brushing the surface of the 60cm x 40cm cake board with edible glue then rolling out black fondant mixed with tylose powder onto the bench. I incorporated the tylose powder not only so it would harden the fondant but also because it turns it from jet-black to a colour that’s more like asphalt.
I rolled and rolled and rolled the fondant until it was big enough to cover the board. After painting edible glue onto the board I then lifted the fondant onto the board. After it had hardened I cut out thin stripes from white fondant and glued them onto the board to look like lane markings.
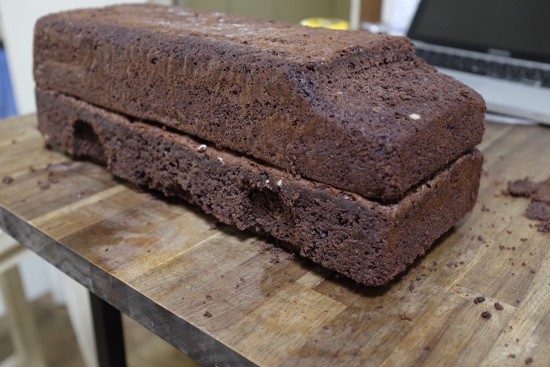
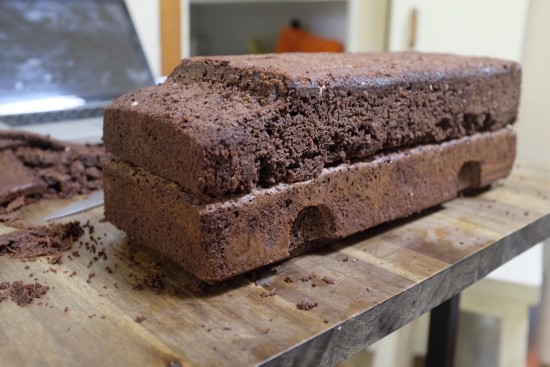
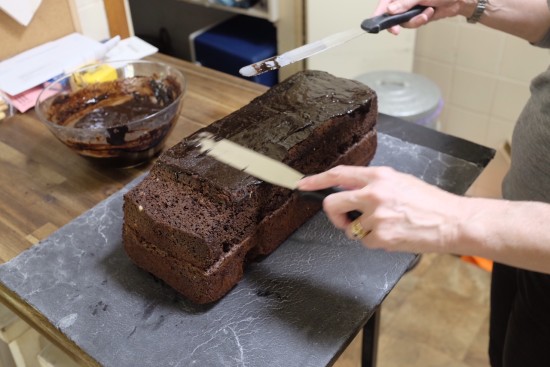
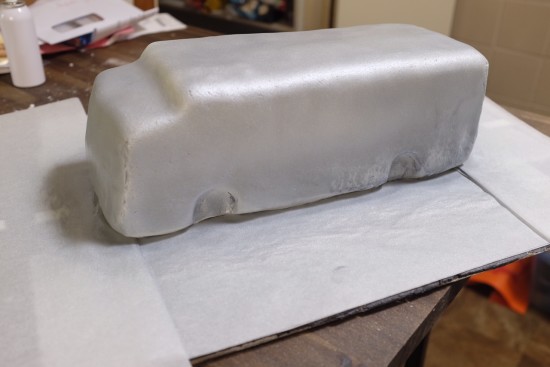
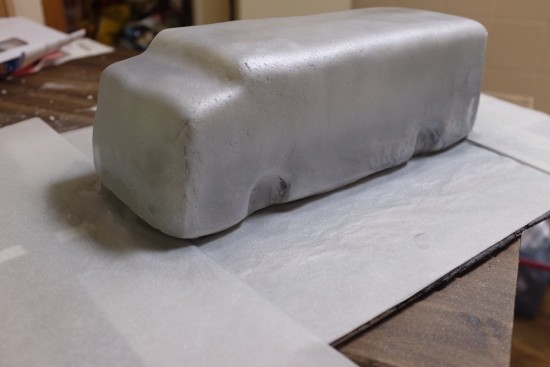
Then we pulled the cake from the freezer and cut it in half, longways. One piece was put on top of the other to give the height of the bus. Drew then enlarged the image of the bus on my computer and using that image as his guide, started shaping the bus that included recessing the wheel and cutting away the bottom edge between the wheels to give the illusion the bus was elevated on its wheels.
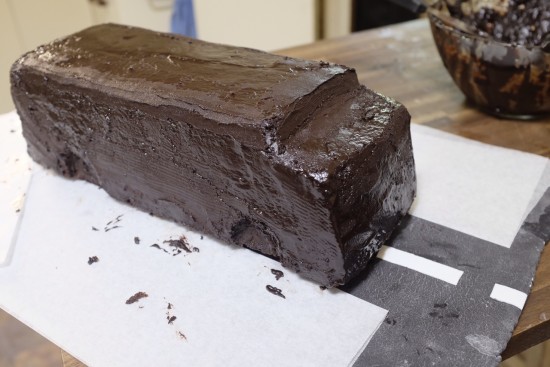
I covered the cake in ganache (600g couverture chocolate melted with 3/4 cup pouring cream over a double-boiler) and waited for it to harden (this is why it’s good to work with a frozen cake; it saves a lot of time).
Then the cake was covered in white fondant. I used an edible colour spray to spray the bus silver. I was told the fondant would need several coats and that each coat needed to dry overnight but I didn’t have that luxury of time and found one coat of silver spray gave enough colour to the bus. (You will need two cans of spray for a cake of this size).
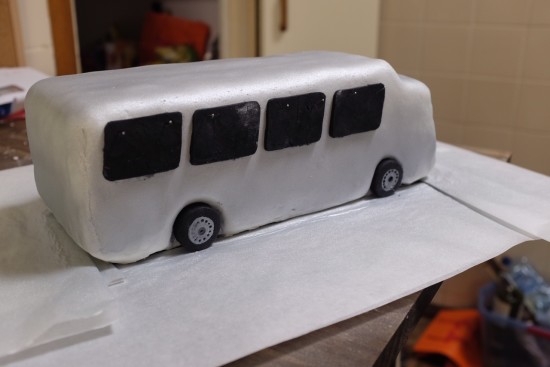
Then came the fun part of decorating the cake. I made wheels out of thickly rolled black fondant. By a stroke of luck I found a circle cutter in just the right size so cut out four wheels. Before affixing them to the cake I used Cake Decorator’s Edible Paint in silver to paint wheel hubs onto the tyres. I then used a tube of black gel to paint other details onto the wheels.
The picture of the bus showed it had corrugated iron sides in places and so we cut out strips of white fondant then used the edge of a ruler to create the corrugated iron look. The strips of fondant were then painted silver then glued onto the sides of the bus.
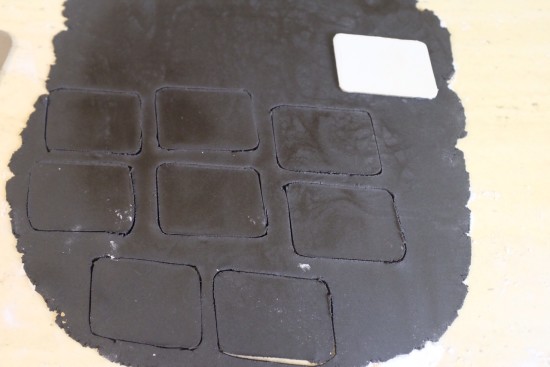
Windows were made by cutting a template out of cardboard then rolling out more black fondant to cut out the shapes that were then glued onto the sides of the bus. I made the rear window and windscreen in the same way. Now…the windows can slide so I used pins to hold them in place until the glue had time to set.
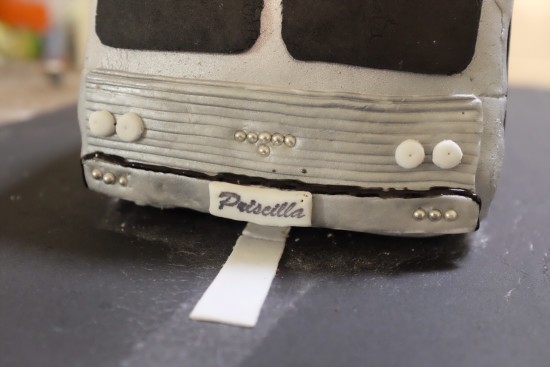
I made headlights using white fondant after I found a little circle I could use as a cut-out.
After the bus was complete it still looked a little plain and like it needed a boost. I found a jar of silver cachous in my drawer and used the cachous to decorate the bus. The little bit of silver bling gave the bus a wonderful finishing touch.
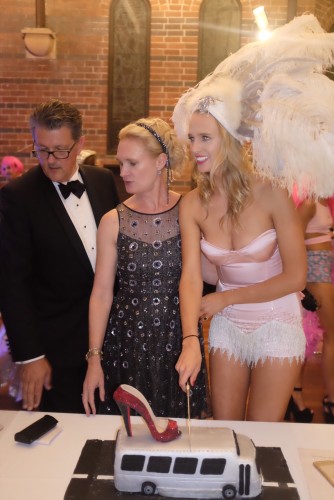
The cake on its road (board) was then carefully transported to the venue. Once in place, I removed the wire that secured the shoe, then placed the shoe on top of the bus. And taking a step back and seeing the finished product was a moment of great relief.
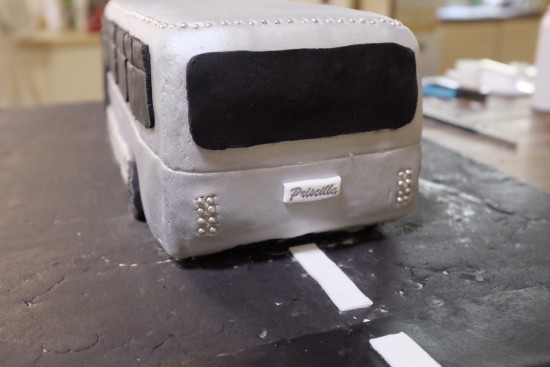
The only part of the bus that wasn’t edible was the number plate – ‘Priscilla’ was written via a stamp.
And there it is…a stiletto shoe catching a ride on a retro bus. Thanks Arabella for the challenge – if she hadn’t chosen the theme, I would never have made a stiletto shoe riding a bus!
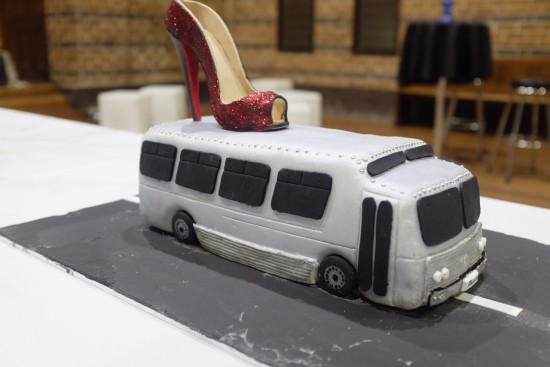
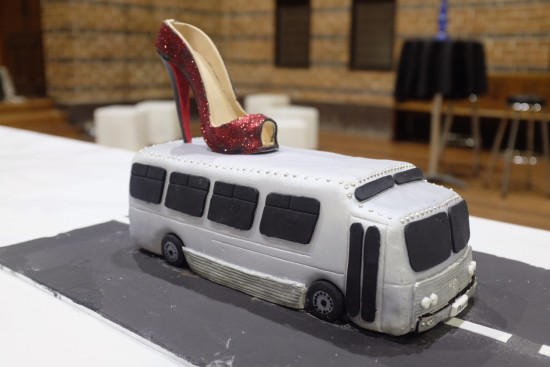
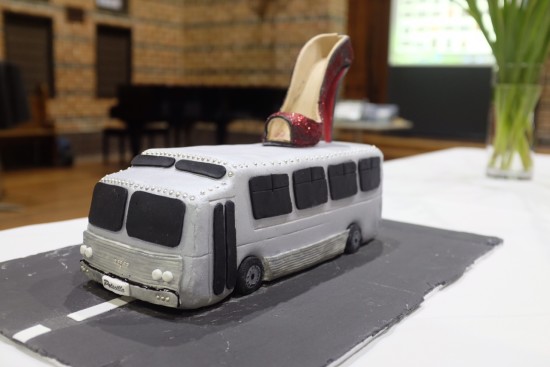


Wow. Just wow! She’s a very lucky girl to have such a dedicated & clever mum.
Astounding! Outstanding! Unbelievable!
That is an amazing cake, so creative and such an effort involved in the production.
But it really made such a fabulous highlight to an extraordinary party.
Such fun!
Thanks so much, Marion. It was a real joy to do (once I was over the stress!)
The amount of time and talent invested in this cake shows. It’s spectacular, Charlie. I barely have the patience to frost a cupcake, so I could never tackle a project like this. I’m sure the bus was greatly admired and appreciated. Well done.
great effort – and now I am trying to remember if I ever saw the movie – such a classic but I don’t have great memories of the bus – I am really impressed with all your efforts and attention to detail – glad it all worked out (though obviously you were able to bring lots of experience and good sense to it)
A big investment in time and effort. Well done.
My hair is almost falling out reading and seeing you made this cake. As you know, I am not a cake baker and have little patience for the process. It stresses me out far too much. I would have pulled all my hair out with this one! I am SO impressed Charlie. You are an excellent cake maker, but this one (pardon the pun) takes the cake! The detail, the precision, the perfection – I mean a sole with sole stiches?! Fabulous!!! Amazing!!!! What a lucky birthday gal to have a mom like you. 🙂
oh my god, now i know you’re crazy!!! What patience you must have!!!
Now that is a true labour of love – Charlie – great job – I thought the Handbag cake I had to make for my niece’s 21st was challenging!
haopy birthday Arabella!! What an amazing job you did, Charlie!!!
So amazing Charlie. Not sure if the pressure is worth it, but you have a career as a cake decorator in front of you if you so desire. It is completely and utterly stunning and I feel tired just reading the steps of how you achieved such a wonder.
Carolyn
OOOOOOMYGOSH,
you are AMAZING & SOOOOOOO talented.
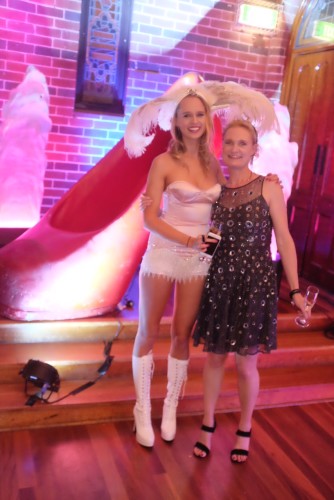
What a GORGEOUS photo of you 2 !!! xx
Wow, what a work of art!!! It’s just a masterpiece, Charlie. Congrats on a job VERY well done!!! xo
You are astoundingly talented!!! I’m in utter awe. 🙂
yep wow indeed! i don’t know how you had the patience or expertise charlie! good on you. i have neither so wouldn’t even attempt such a thing. glad to see arabella had a great birthdah..
Its a fantastic cake Charlie. i love it!. Although I have no idea how you had time
It’s so difficult to make a shoe-I’ve tried to make it out of fondant and it has failed miserably! You did a wonderful job with the cake Charlie!
Thanks Lorraine. I can highly recommend the stiletto shoe kit.
I’m so impressed with your inner sole … and of course the whole fabulous cake! I love that the boys helped out too, you make a great team. What an amazing 21st birthday party, lucky birthday girl is Arabella 😉
Thanks so much, Danielle. I was so relieved there was a kit to help me make the stiletto as otherwise, I’m not too sure how it would have turned out!
I’m always in awe of you’re incredible creations, Charlie … I’m seriously impressed with this one! x
Absolutely awe inspiring Charlie. Your cakes are always incredible.
Have a wonderful weekend.
🙂 Mandy xo
You have SUCH talent!! What a great job and I love that stiletto, well worth all of the work to make it perfect. 🙂
This is so creative and you’ve got so much patience!
Wow Charlie congrats on this awesome cake!!! You did a wonderful job on the both parts – I think I would have ordered it in!!!!! Cake decorating isn’t my thing really….Arabella is a lucky girl to have such a dedicated mum xxx
You are the mother I want to be. How clever you are! That bus and shoe are so cool!
You never disappoint Charlie, your came creations are always amazing! I’m so glad you found that kit, I would have been stressed to the max trying to make the stiletto from scratch. Wonderful job, and it certainly looked like a wonderful night as well xo
What a fantastic creation. You are so creative and has the talent and knowledge to match,
That is just epic! Who knew you could get a kit to make an edible stiletto.
WOW!!! That is super amazing!
You have done such a spectacular job on the cake!!
I don’t think I would have had a clue where to start!! I’m seriously speechless… there is no way I will be showing the cake to my daughter :0!!!
Well done to you Charlie xxx
..and congratulations on raising such a gorgeous girl.
Julie
Gourmet Getaways
You are an absolute artist! No question! I am absolutely in awe of how detailed you are in your cake creations. Impressive on every level, Charlie! I need to stop now…allI can do is gush! 🙂
You are such an awesome mom!!! I don’t think I could have managed this cake, so much work and precision. It turned out amazing and I think the birthday girl was super happy!
A truly amazing special home-made fantastic bus! waw!!!
Arabella looks really beautiful & what a fancy cool party too! xxxx
You are certainly the star baker! xxx